
When my husband and remodeled the exterior of our home we wanted to do something unique and modern for the address numbers. After some quick googling, we found some images of address plates that we liked but many were custom made and super expensive!
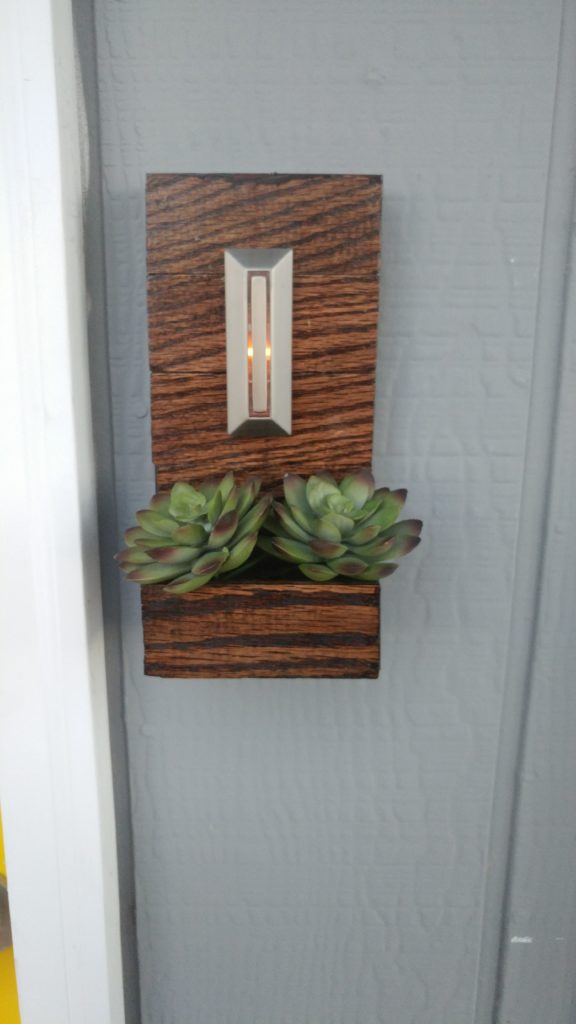
Between me (the visionary) + my husband (the handy one), we were able to think up a simple, modern address plate. On top of that, we even created a fun doorbell planter box! We have had a lot of compliments on both the address plate and doorbell planter and we LOVE how they add to our house.
About a month ago my husband walked through the side door and announced to me that he had just found a dead scorpion (!!!) right outside the door. This totally FREAKED me out because one- who isn’t afraid of scorpions? but also two- my desk that I sit at quite often is right next to said side door. So I kind of freaked out, also nervous that maybe a scorpion would be able to get inside our house and sting our little baby Ava.
After this freak out, Ryan promised he’d talk to our neighbor who sprays pesticide. Thankfully our neighbor came over as soon as he could. This momma was able to breathe a sigh of relief! Instead of paying him for his services, he requested that we simply make an address plate for their home instead! He was super generous to offer this in exchange for payment. Needless to say, Ryan and I were really excited to plan out an address plate for their home.
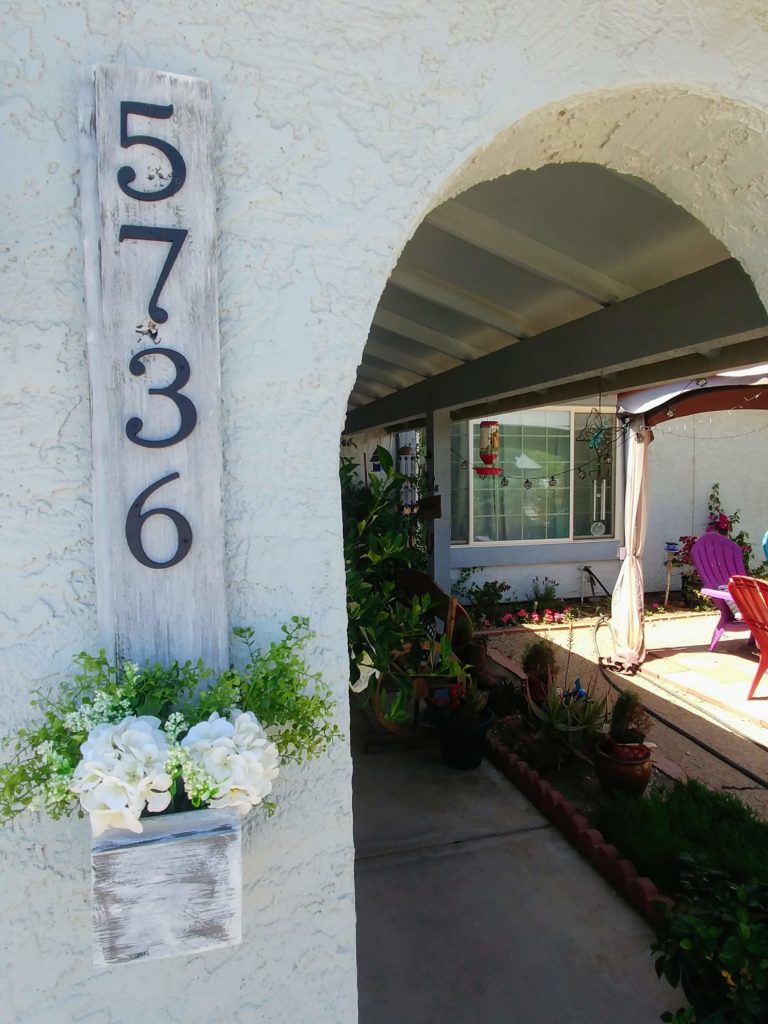
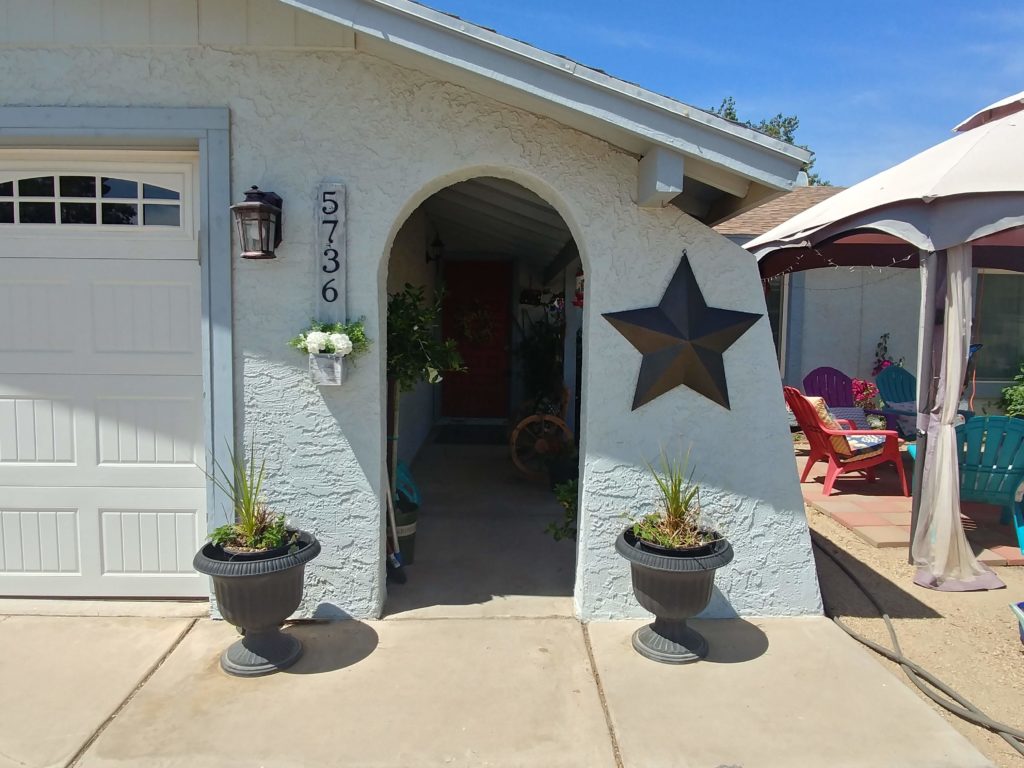
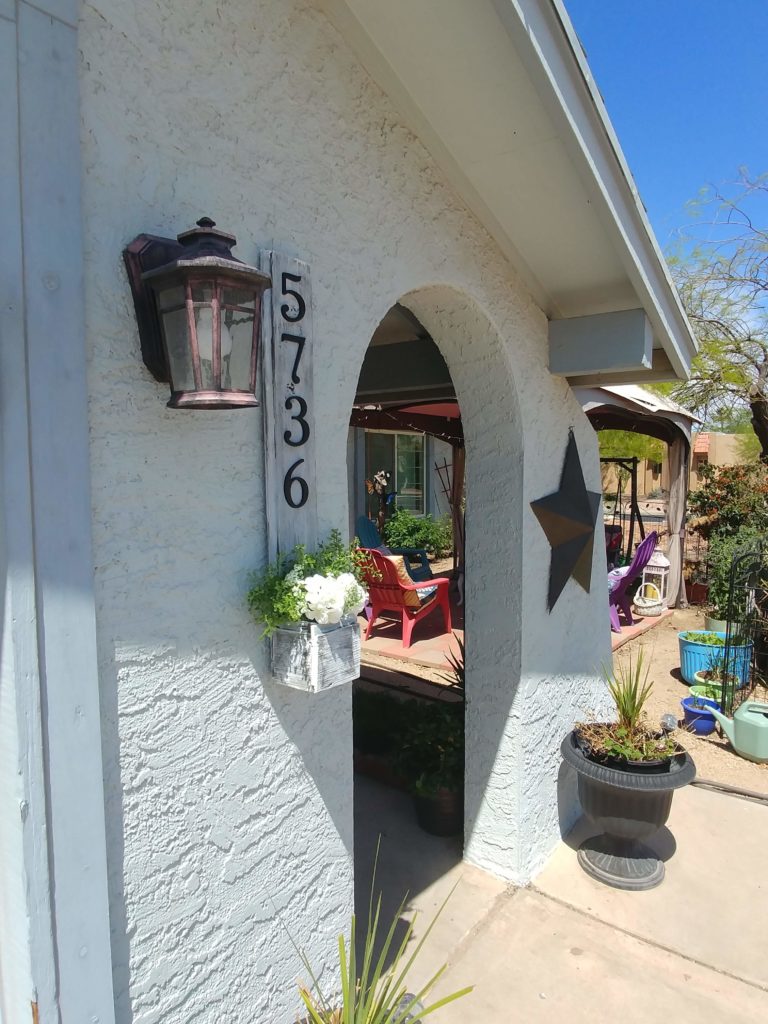
Since their home has a rustic feel to it, we brainstormed some ideas for what we thought would really look great on the exterior of their home. Here are a couple of pictures of the final project:
Of course, if you’ve never made something like this before it can seem super daunting to just jump right in! That’s why we’ve broken down everything step-by-step and included pictures to help you out. No need to be intimidated! We’ve even included links to help you purchase any items that you may not have.
For this project you will need:
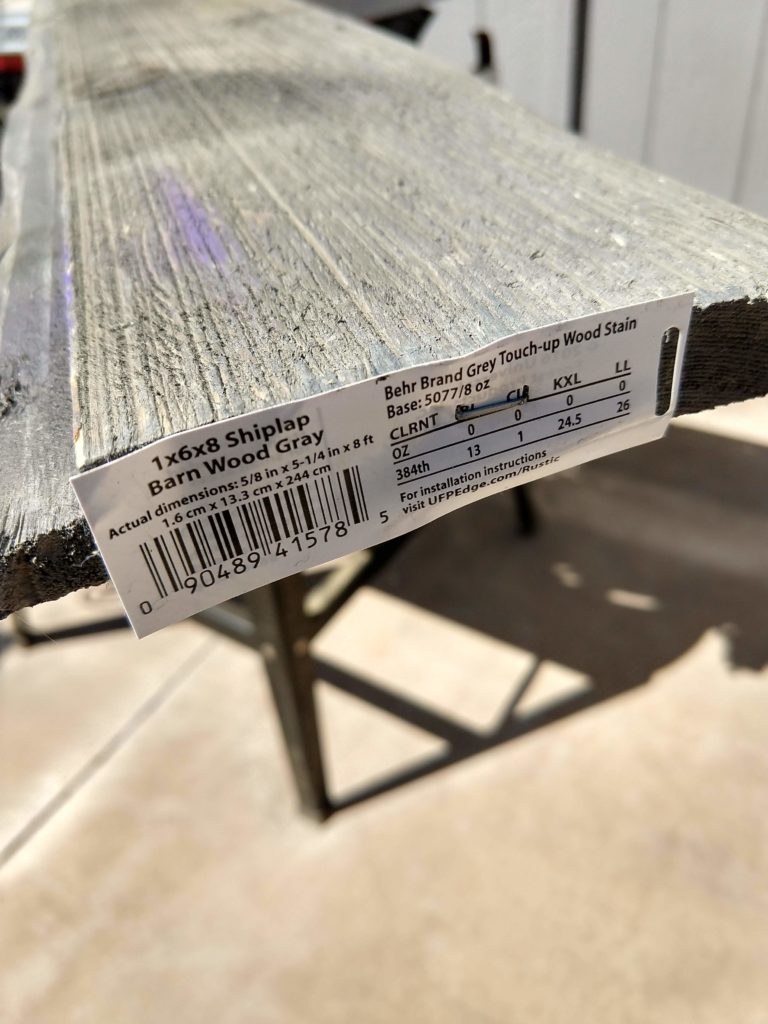
- 1″x6″x8′ piece of shiplap barn wood, or any wood you like
- Address numbers
- Table saw/chop saw/miter saw
- Wood Glue
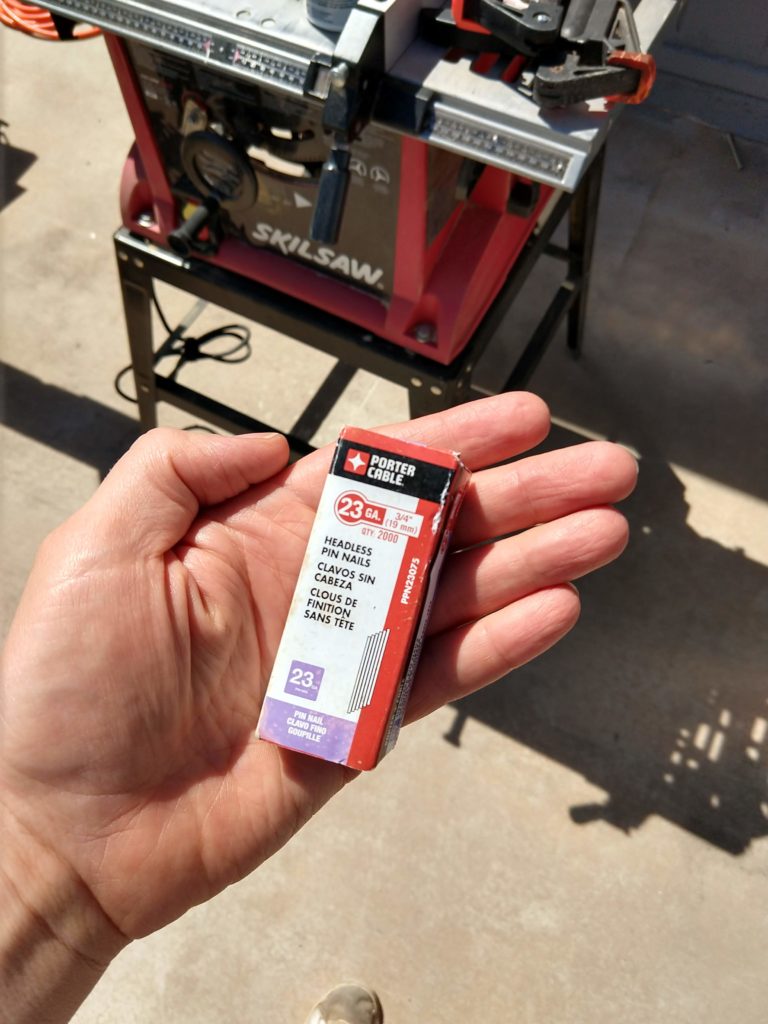
- 23 gauge headless pin nails
- Nail gun
- Paint (if you choose)
- Flowers/Plants (for the planter box)
A quick tip before we start the tutorial:
We went to the Home Depot to find some wood to use. Something my husband always does at the beginning of a project using wood is to check the scrap discount pile which is usually found in the back by the saw where wood is custom cut for customers. This scrap pile typically has wood that is warped, chipped, or damaged in some way. Home Depot will spray paint the tips purple to indicate that this wood is 70% off.

On the day we started the project we were lucky enough to find a piece of shiplap, which we were excited about because we were wanting to create a rustic look. This piece of shiplap is typically $10 but we got it for $3! While we were there, we also picked up a perfect piece of facia board for 75% for a future project. Make sure to check out the scrap discount pile next time your DIY project includes wood, you might just come across something great and save some money!
Ok, now for the tutorial:
Step 1: Purchase a piece of wood that you like. We bought a1″x6″x8′ shiplap barn wood. While we found this piece in the scrap pile, click here to purchase it for full price.
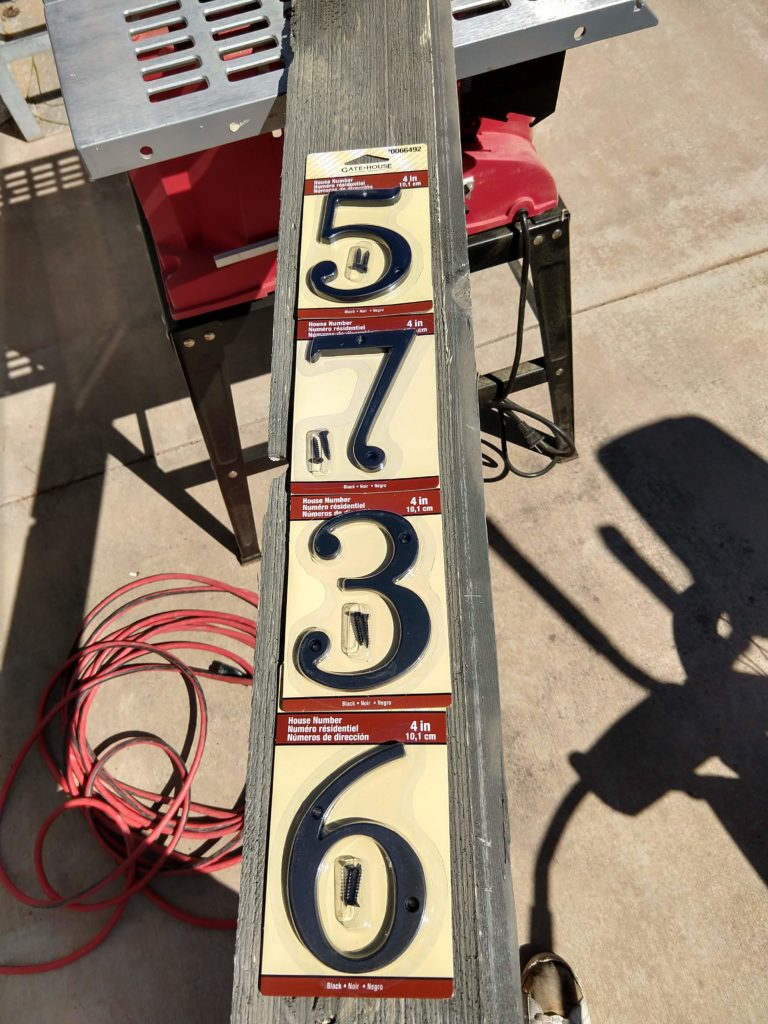
Step 2: Find address numbers that fit the wood that you’ve picked and that go along with the style you are wanting to create. We didn’t like the selection at The Home Depot so my husband drove to Lowe’s (they are only a mile apart..talk about convenient for DIY projects!) At Lowe’s he chose 4 inch Gate House brand house numbers (Click here for a link to Lowe’s website to purchase these house numbers).
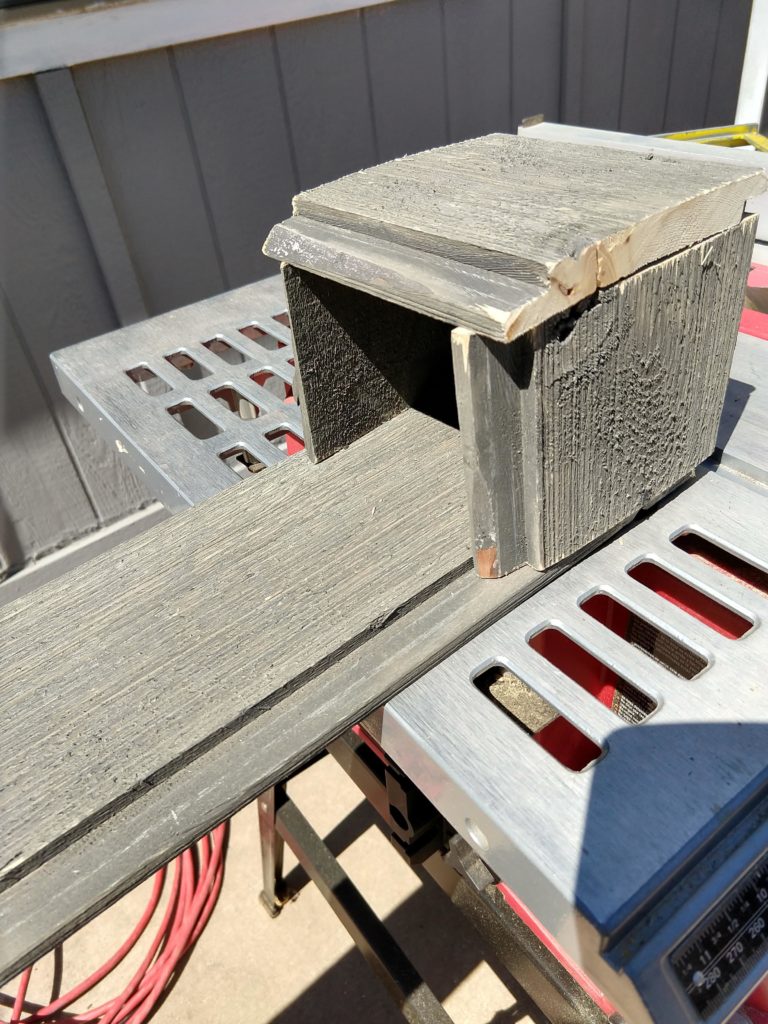
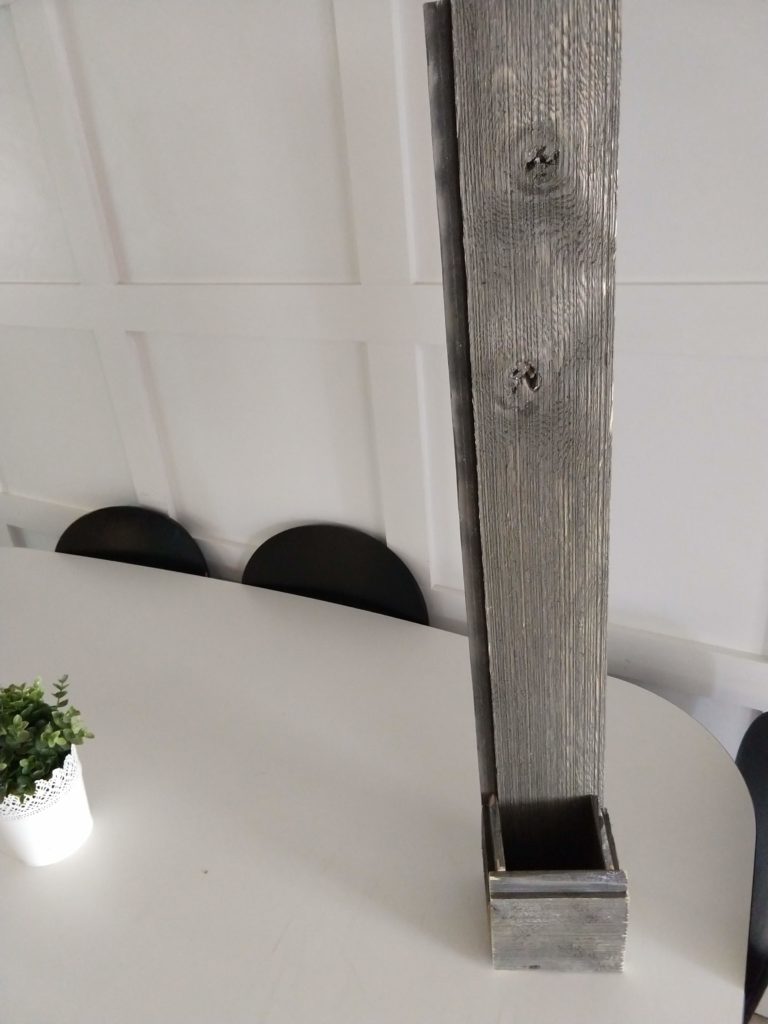
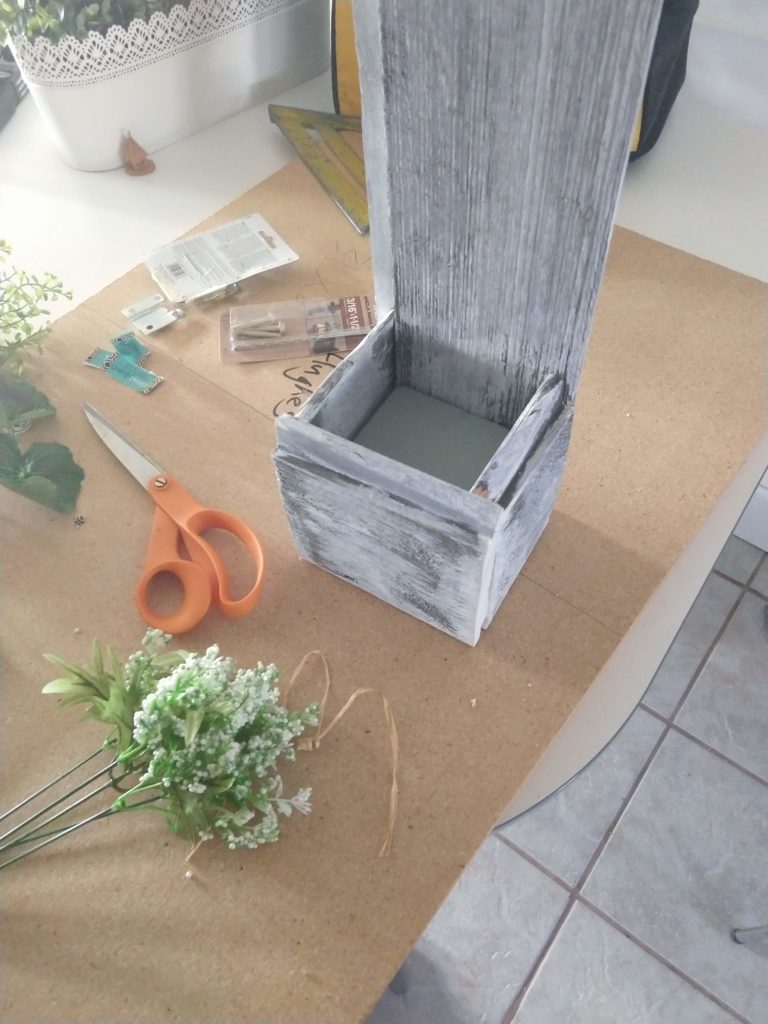
Step 3: Construct the planter box. Shiplap can be difficult to work with because it has a lip on each edge, making it a weird shape. However, since we were wanting to create a planter with a rustic style we used the edge to our advantage. Creating a planter out of shiplap proved to be a little bit difficult. After some trial and error, Ryan figured out how to construct the planter box using the existing edges.
Ryan used a table saw to make these cuts but you could also use a chop saw or a miter saw.
The measurements to construct the planter box are:
- Bottom piece width: 4 5/8″ (You will need to cut off the upper lip on this so that it will be 1/2″ shorter than the other pieces). Ryan also drilled two holes in the bottom of this piece to allow any moisture accumulation to drain out
- Right side width: 3 1/2″
- Left side width: 4″
- Front piece width: 5 1/8″
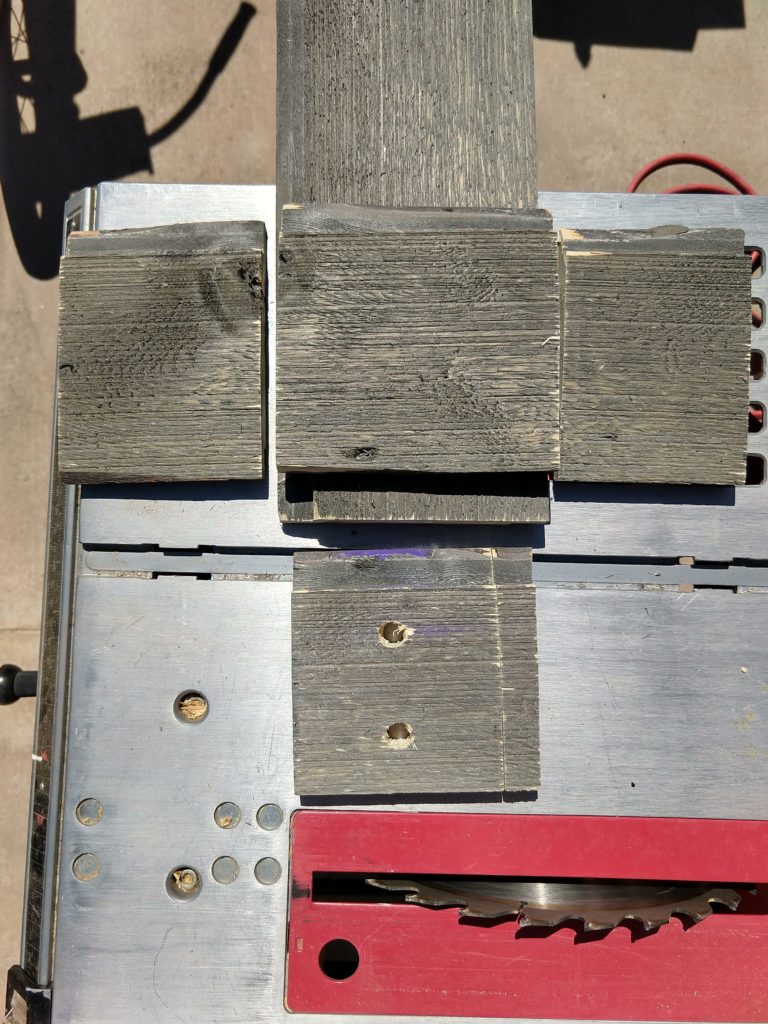
We then fit them together using the existing lips (just like a puzzle). These are the dimensions we liked but feel free to use different dimensions when creating your own planter box! The dimensions we used gave us a planter box that was 5 1/2″ tall.
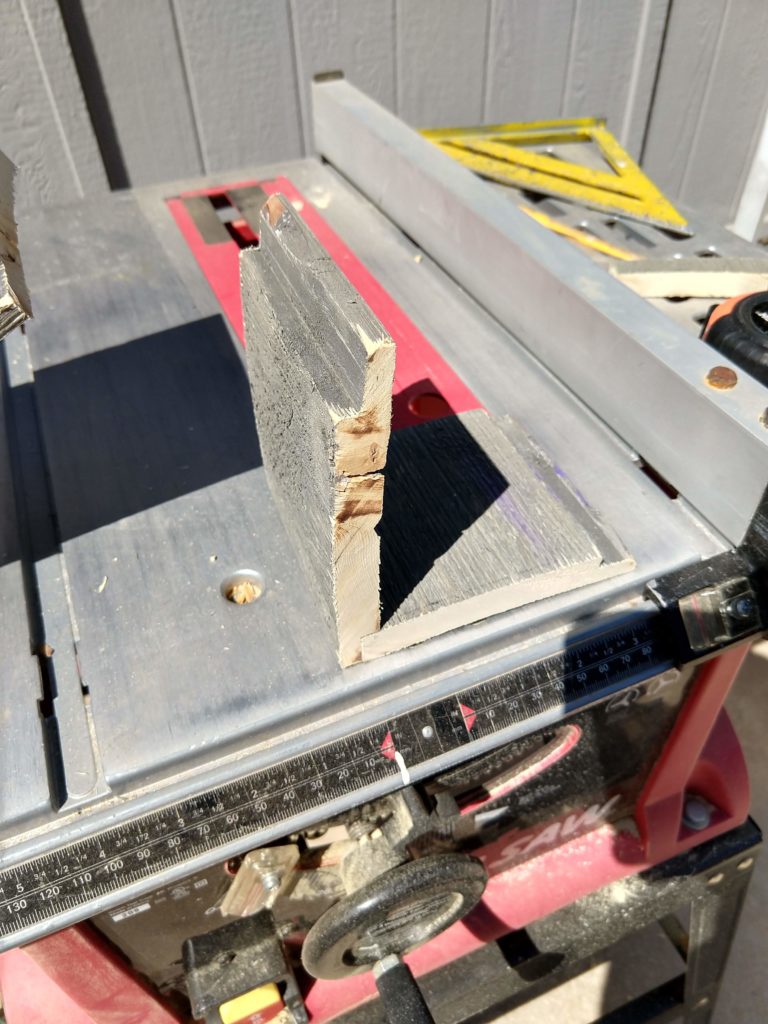
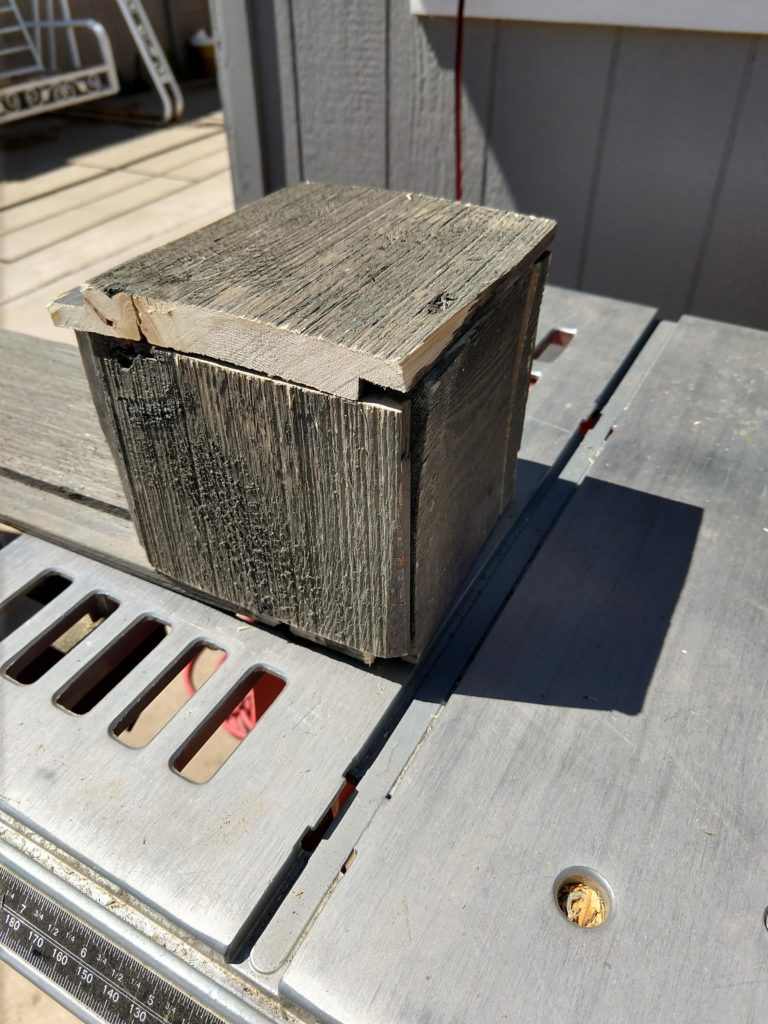
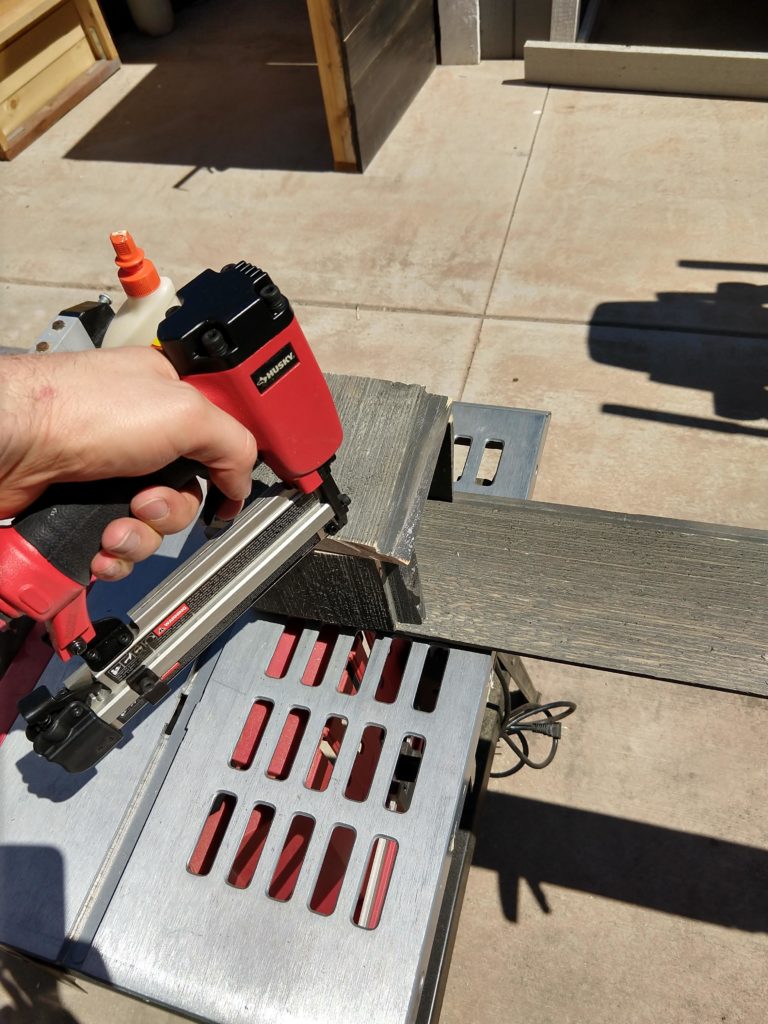
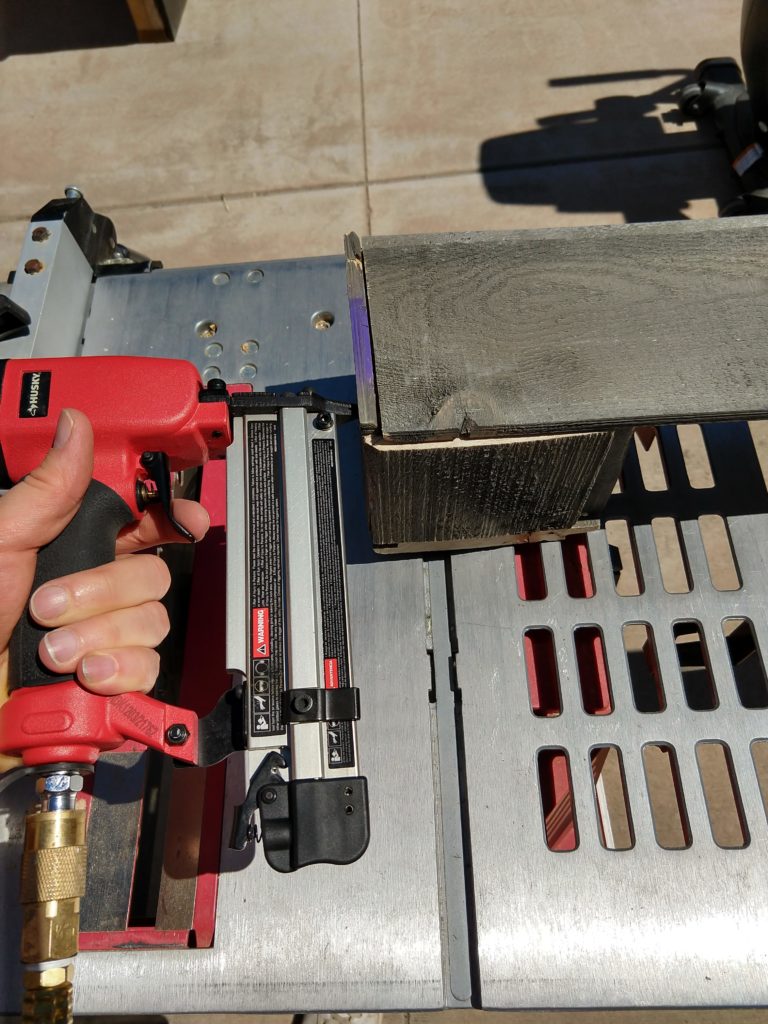
Step 4: Glue the planter box together.
First, we glued the bottom of the box to the address plate, then the sides of the box, and then front of the box. We used Elmer’s Wood Glue (click here for link). Put an appropriate amount of glue in the groove of the lips, making sure that when pressed together that the glue won’t overflow (if it does overflow, just wipe it off with a rag as quickly as possible). Apply to all pieces that join together to create the planter box.

Step 5: Nail all pieces together.
We used 23 gauge headless pin nails and a nail gun. You want to make sure to nail all around and get all of the joints nailed together. This will help strengthen your planter box. Also, don’t forget to wear ear and eye protection 🙂
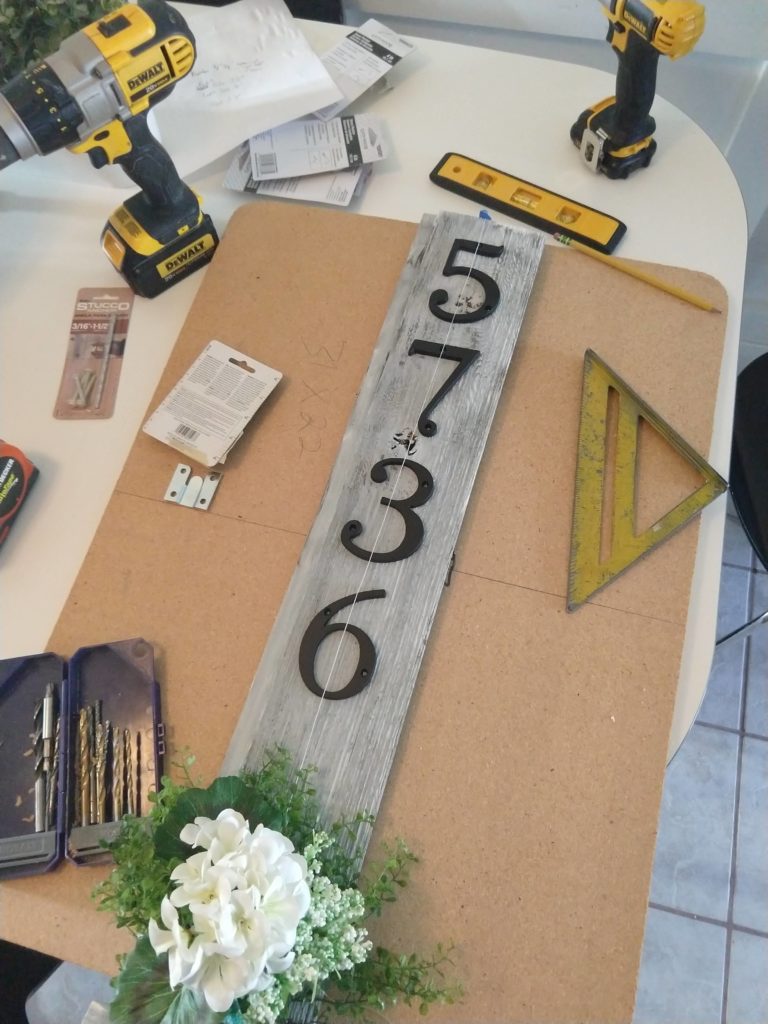
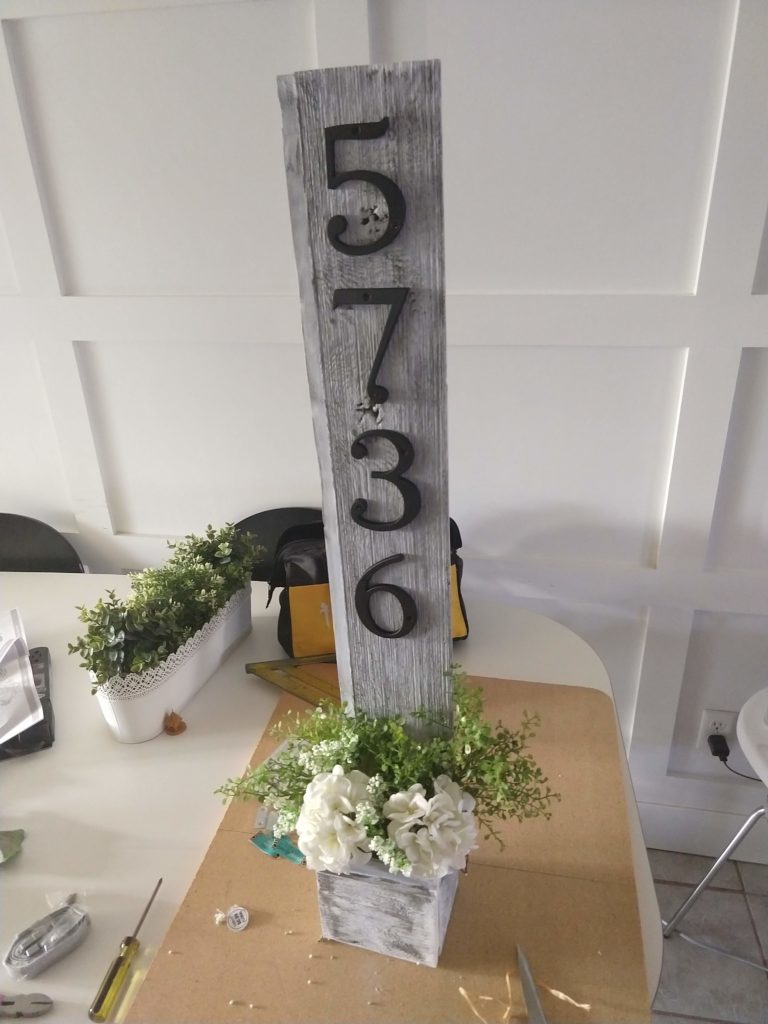
Step 6: Lay out the numbers and figure out how long you want your address plate to be.
Since we had 4 numbers to add to the address plate, we laid them out and decided that 34″ tall was aesthetically pleasing.
Step 7: Add the final touches to your address wall planter.
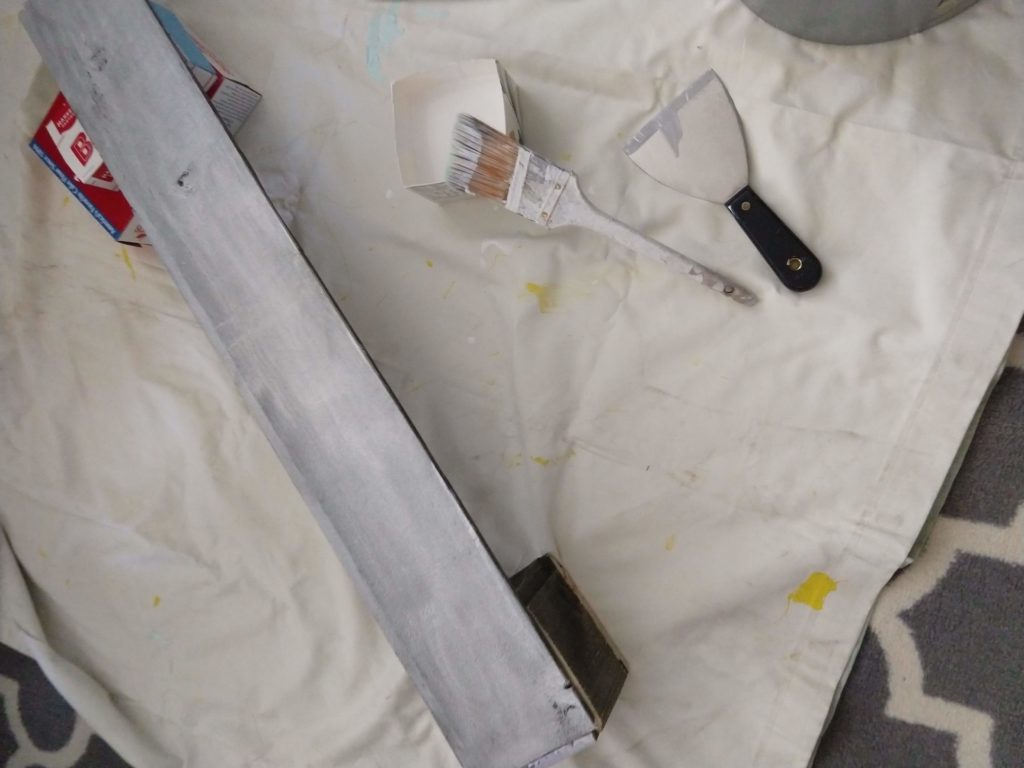
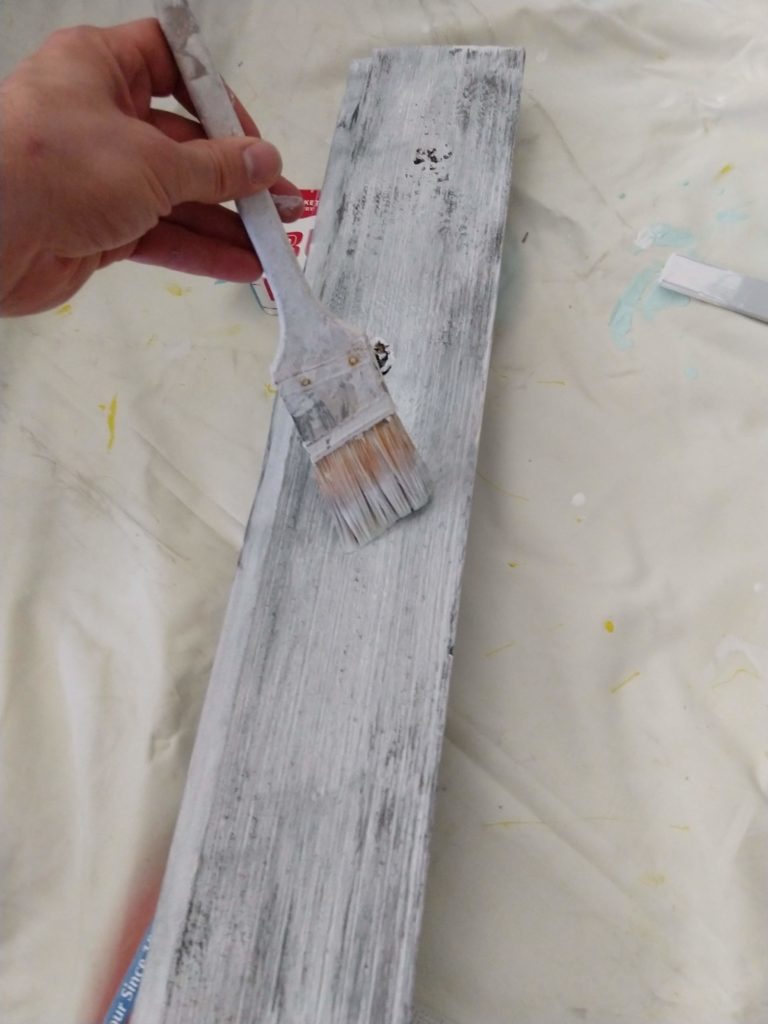
Since we were wanting to create a rustic style to match our neighbor’s home we decided that a white washed look would look great. You may decide to do something else depending on what style or look you are going for!
In order to enhance the rustic style of our project we mixed white exterior latex paint (we only used 1/2 cup or so) with a little bit of water. We used the bottom of a milk container to mix the two together. Mix well and then use a paintbrush to apply. Apply as many coats as you want (we did 3).
Step 8: Install the address numbers.
We made sure to center the numbers to help the project look clean using a string brought down the middle of the numbers to check for alignment. The numbers had about an inch in between each number.
Before you install the numbers, make sure the numbers are straight and aligned. Using a level can help with this! We accidentally screwed the 7 in a little crooked and had to reinstall it.
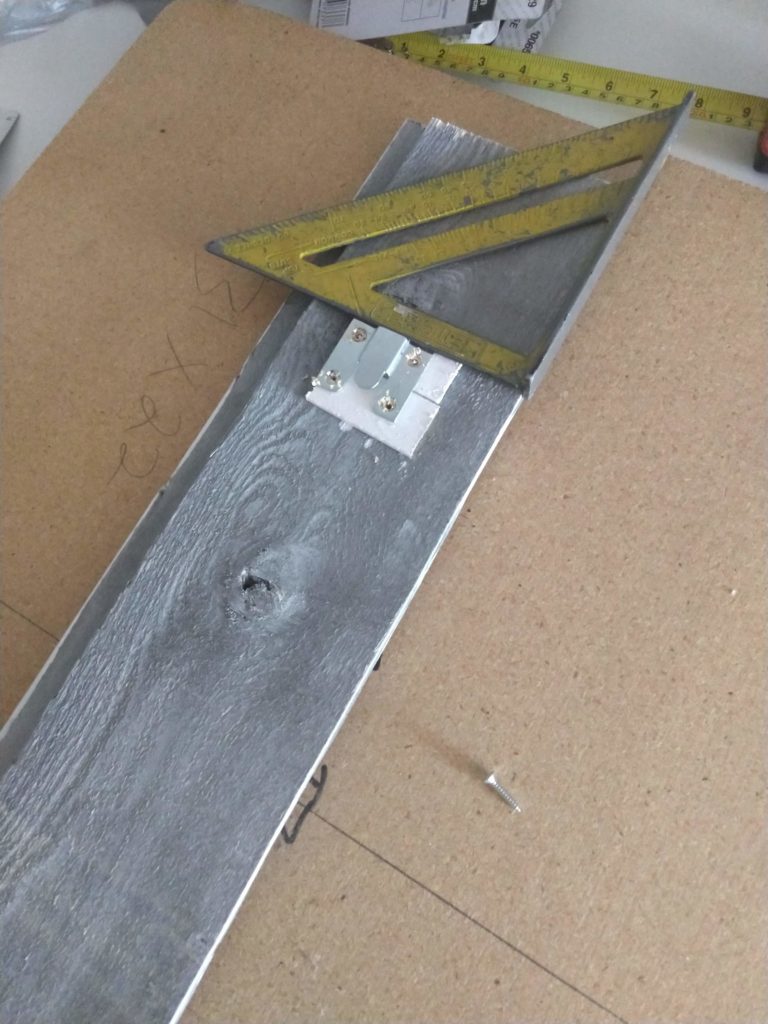
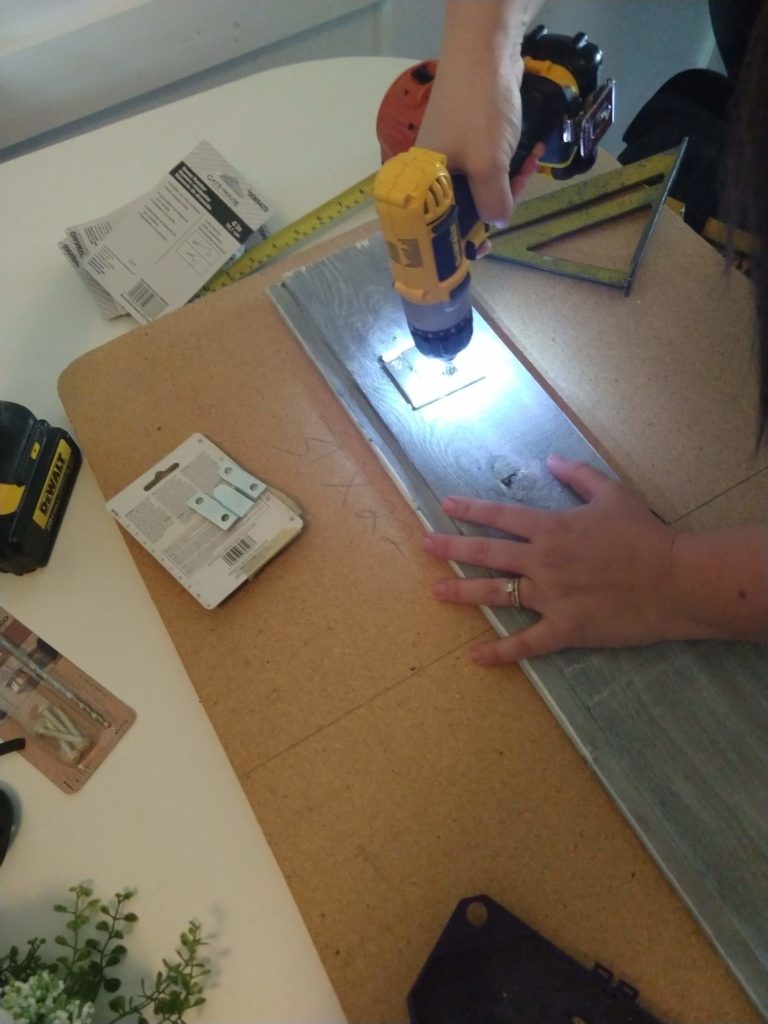
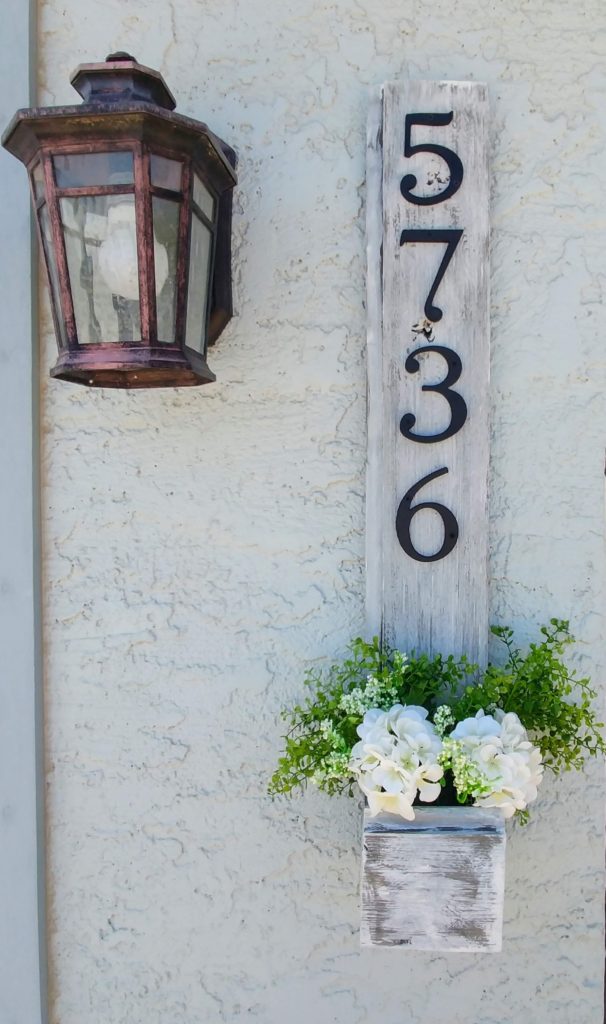
Step 9: Install the hardware on the back so you can attach it to the exterior of your home.
We used Hillman flush-mount hangers from The Home Depot, size large. When you place the board down on the work surface, make sure to put a towel underneath so you do not scuff up the numbers. Make sure to center it as well as make sure it is level. The wood we used was about as thick as the screws are long so we had to glue extra pieces of stir stick to mount it on so that the screws wouldn’t go through the front of the board. We also drilled small pilot holes for the screws to go into.
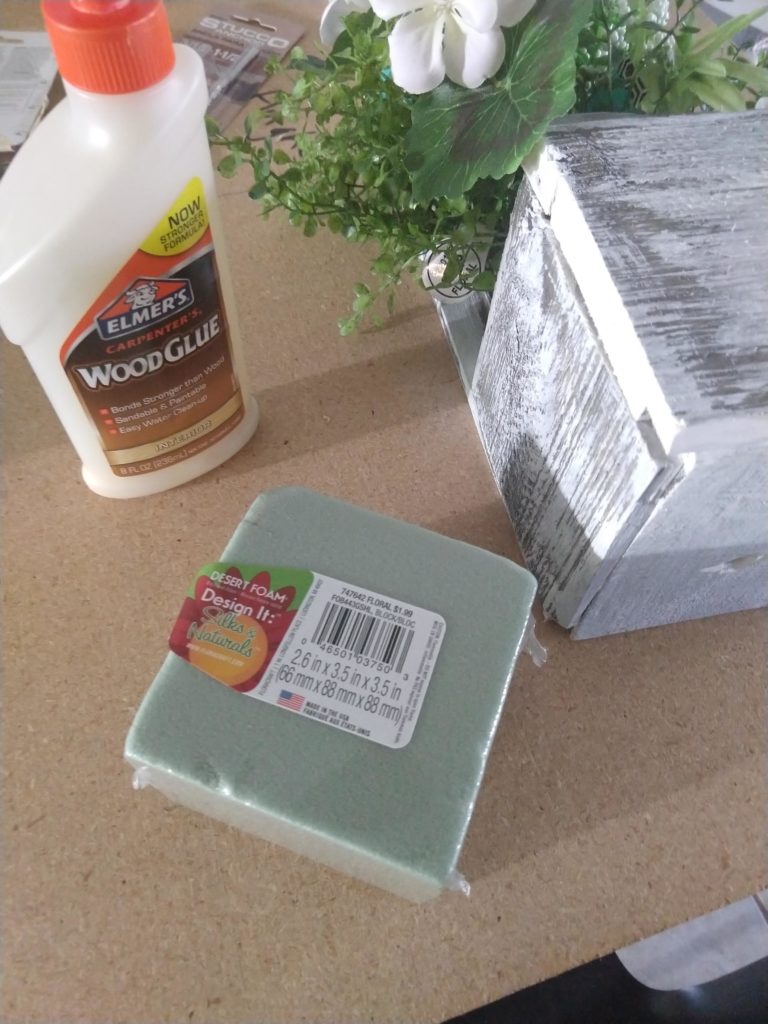
Step 10: Assemble the flowers or plants in the planter box. We made it easy for our neighbors to upkeep their planter box by purchasing them fake flowers 😉 You can of course, choose to purchase and maintain real plants!
We stopped by Hobby Lobby to pick out some flowers we thought would look great in the planter box. We also purchased a foam block to plant the flowers into so they wouldn’t blow away in the wind or in a Haboob! (that’s what dust storms are called here in Arizona!) Since the foam block we chose was such a great fit for our planter box, we decided to not use wood glue to attach it to the bottom/sides of the planter box. If you are concerned that your flowers may blow away, I would recommend using some glue.
Step 11: Install your beautiful, DIY address wall planter! We used some stucco screws to screw in the other half of the hook.
xoxo
Nicole