Creating custom t-shirt designs definitely has to be one of my most favorite projects ever. I love being able to put my personal touch with fun quotes, designs, fonts, etc! When my husband gave me the Cricut Maker for a Christmas gift a few years ago, I was worried I wouldn’t get around to using it much. How wrong I was! I have made so many fun t-shirt designs with it!
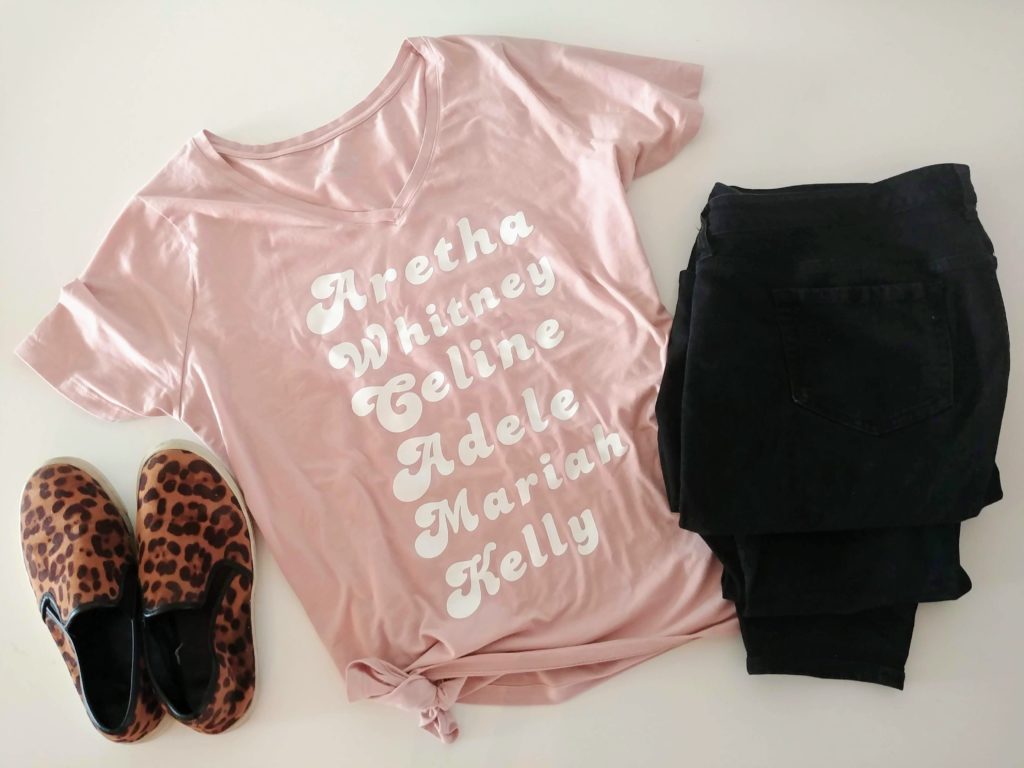
I was super excited to finally get around to work on this project. I have had this design sitting around in my head for the past few months! I LOVE all of these divas. I would love to see all of them in concert (I’m 3 for 6) although now I’ll never have the chance to see the Queen of Soul ;(
Using the Cricut (you can also use the Cricut Explore) you can make fun, unique, and creative t-shirts for an upcoming trip to Disney, family reunion, or surprise a friend with a thoughtful (and potentially hilarious) gift! And best of all, it really doesn’t take that long!
While Cricut and Etsy have many designs you can purchase, you are also able to make your own using Cricut Design Space. It’s not as hard as you think!
For this project you will need: a t-shirt (or whatever else you want the design to go on, fabric only), an iron, and iron-on material. I like to get mine at Hobby Lobby…especially when it’s on sale or I can use the 40% off coupon!
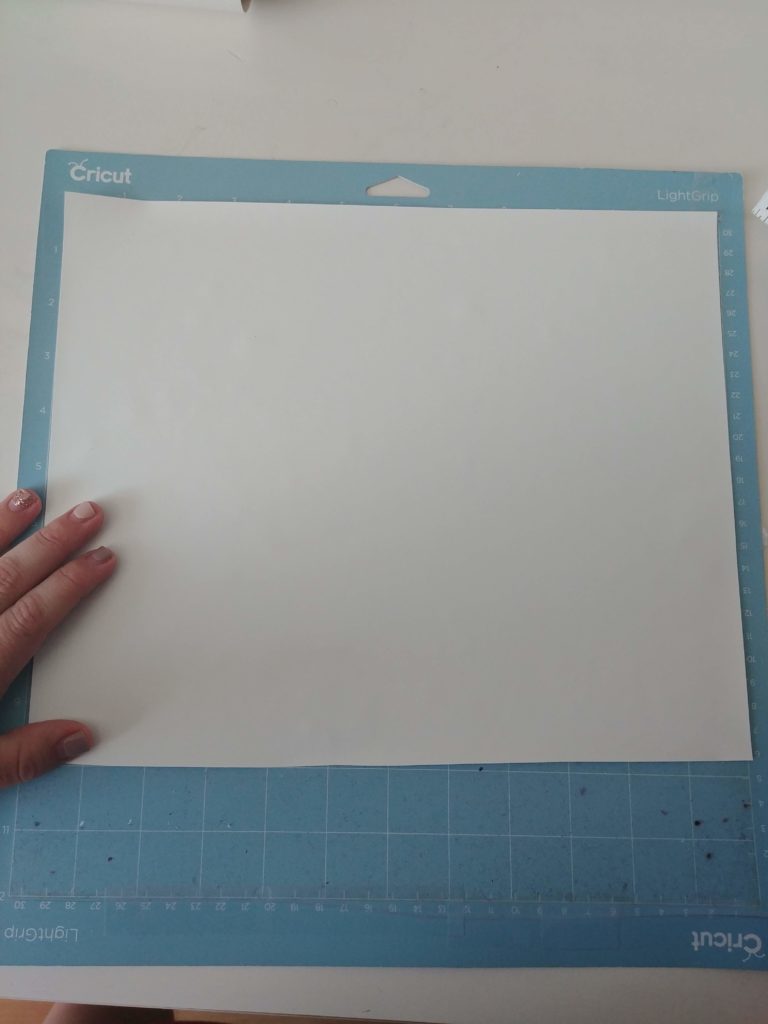
Here’s what the iron-on looks like or click here to buy it online
Here’s my step-by-step tutorial on how to create your own custom t-shirt using the Cricut:
- Launch Cricut Design Space or click here
- Under “My Projects” Click on the + New Project
- On the left, click on “Templates” and choose “Classic T-Shirt” or whatever you want to use as a template that resembles your finished project
- Now, grab your t-shirt or whatever else you will be placing the design on!
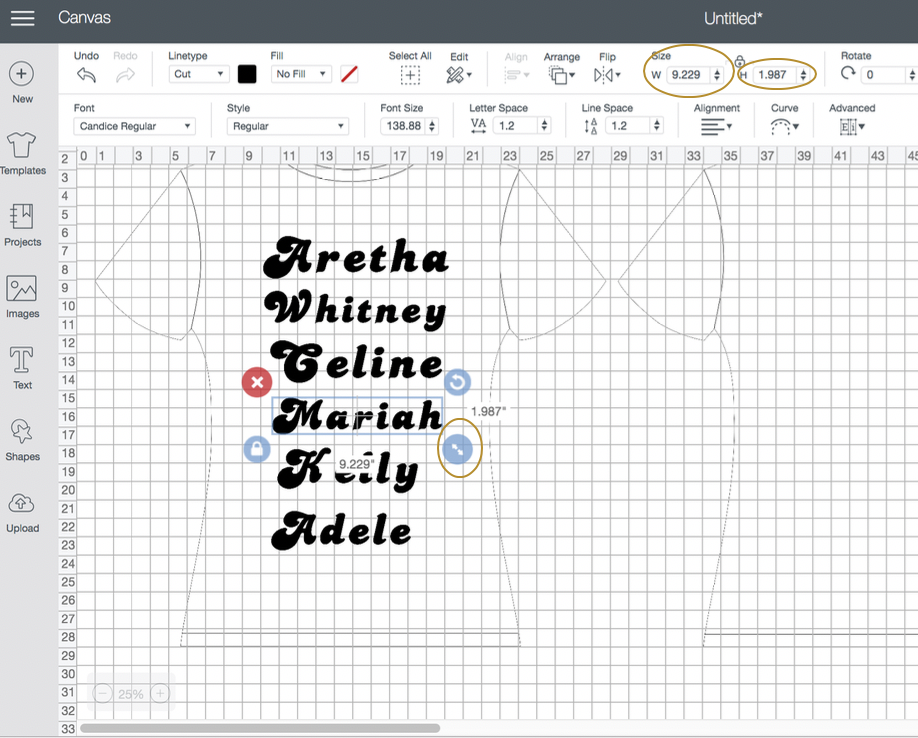
- You will need to measure the desired area that the design will take place on your t-shirt, bag, sweater, etc. (You can use the templates to help you envision the final product but you will want exact measurements for your project!)
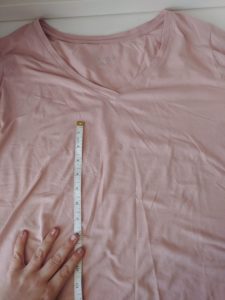
6. Now, you just need to figure out how big to make the design. For example, I knew I wanted my design to take up 10 inches (height) and I planned on have 6 lines of text. So I divided 10 by 6 and ended up with each line needing to be about 1.6 inches. I took a little away from that for spacing and decided that the letters of text would all be 1.5 inches.
7. Input your design into Cricut design space!
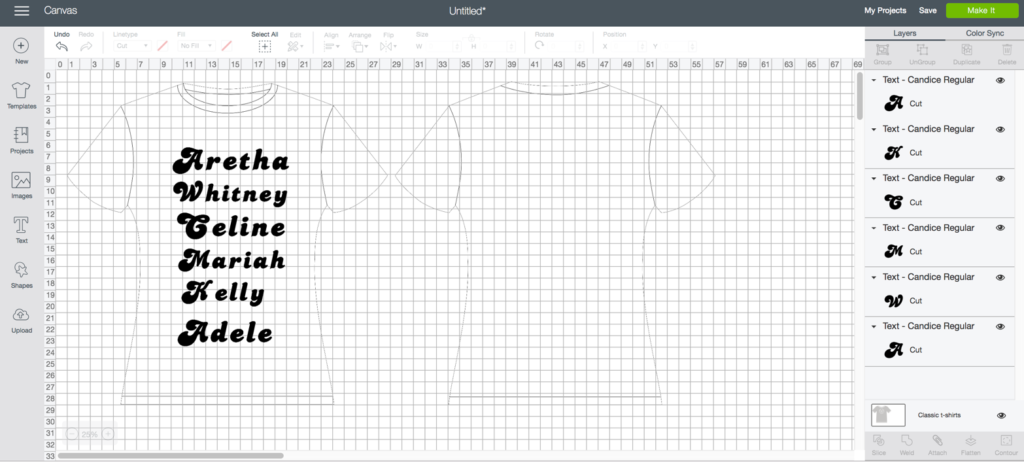
8. Click on your design to size it correctly.
9. Once you are happy with your design, click on the top right of the screen on the “MAKE IT” button. Now the Cricut will place the design in a sequence ready for cutting.
10. ****IF YOU ARE USING IRON ON MATERIAL!**** Make sure to click on the “mirror” button and place your iron on material SHINY SIDE DOWN. Failure to do this will result in your design being cut backwards (I’ve frustratingly done this too many times!)
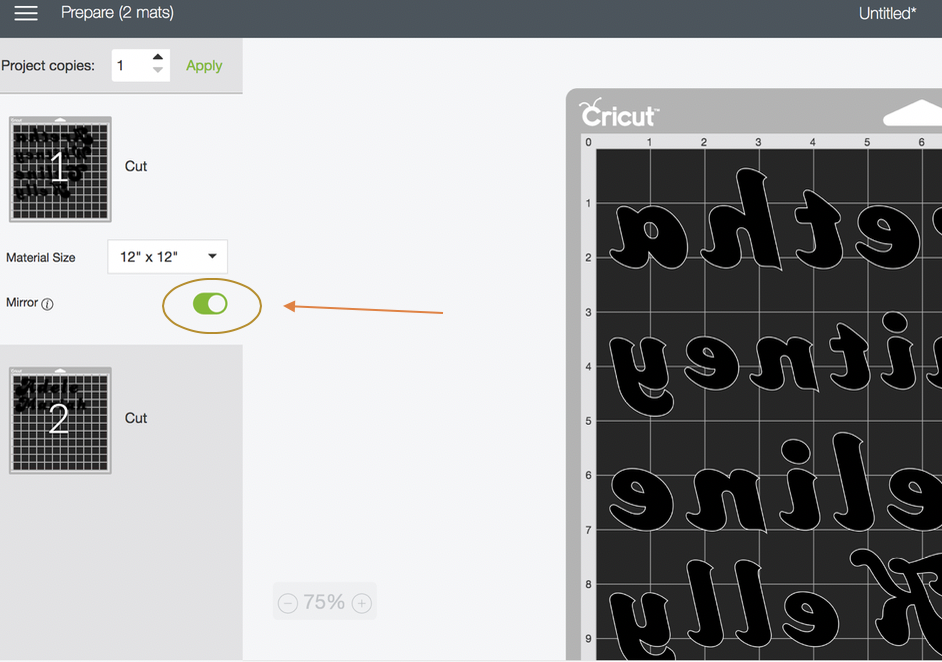
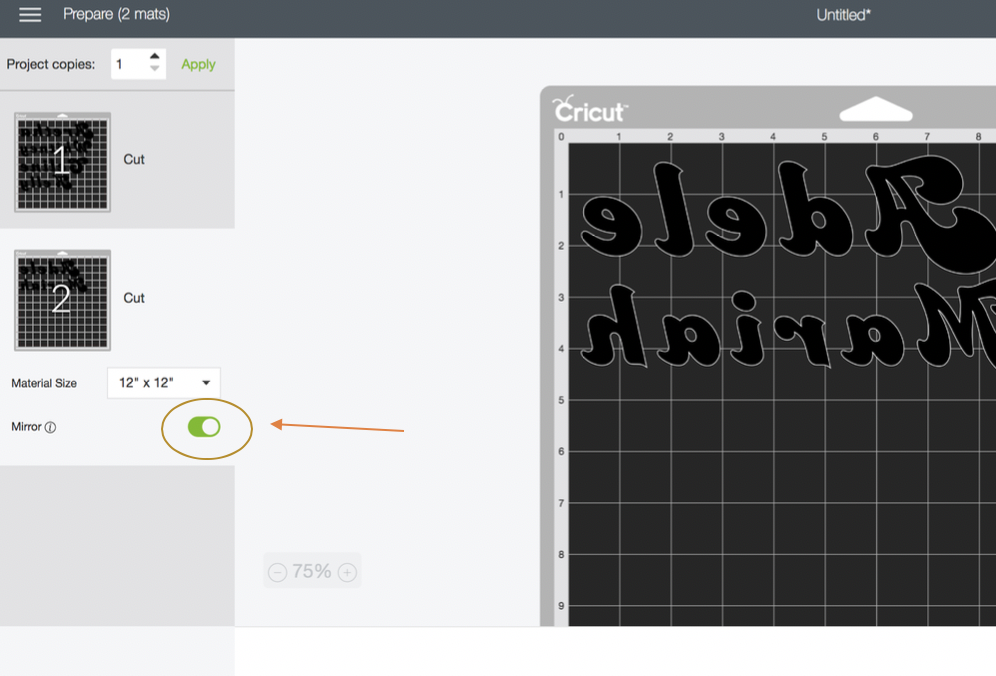
11. If your design takes up 2 pages, make sure to click the “mirror” button on the second screen and put the iron on material shiny-side down again!
12. Click “Continue” and make sure your Cricut device is turned on and shows up in the top center of the screen.
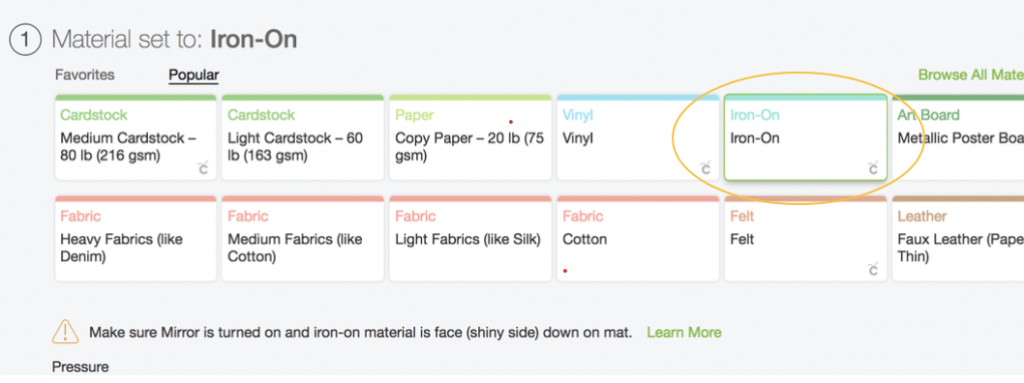
13. Set your material. This helps the Cricut know how much pressure to apply. For an iron-on design, click “iron on”
14. Load your material onto your stick mat and into the Cricut! Follow the directions on your computer.
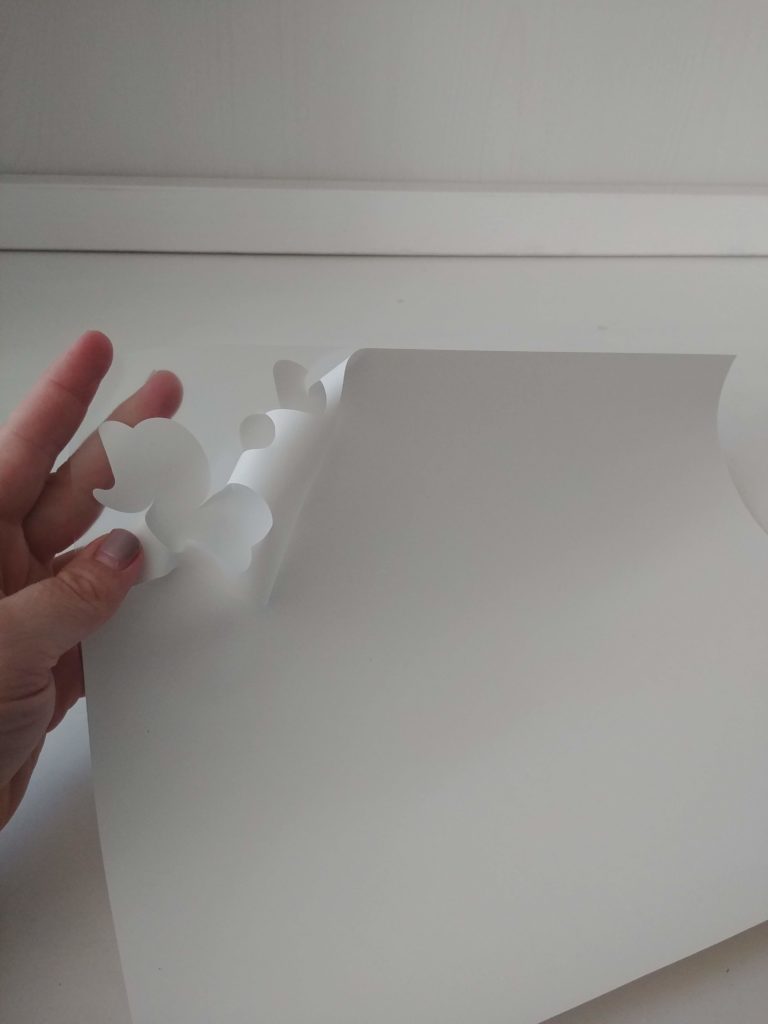
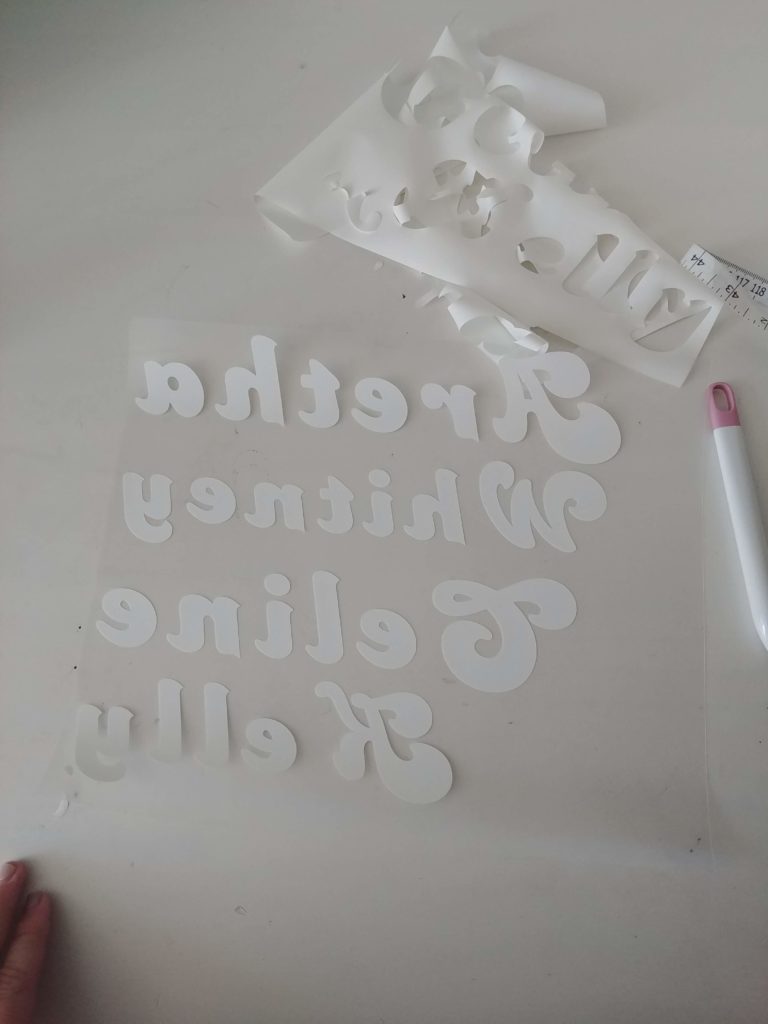
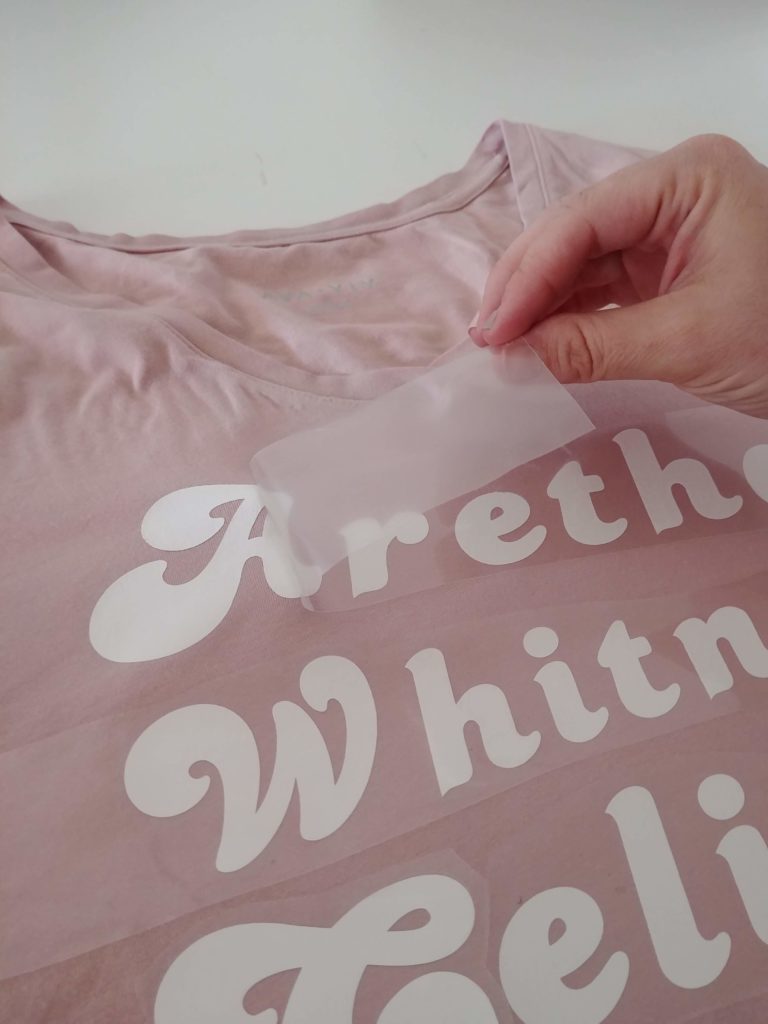
15. Once the Cricut has finished cutting your design, slowly pull of the plastic backing. Do so VERY CAREFULLY, especially if your design has an small or intricate parts!
16. Assemble your design on to your shirt, bag, sweater, or whatever!
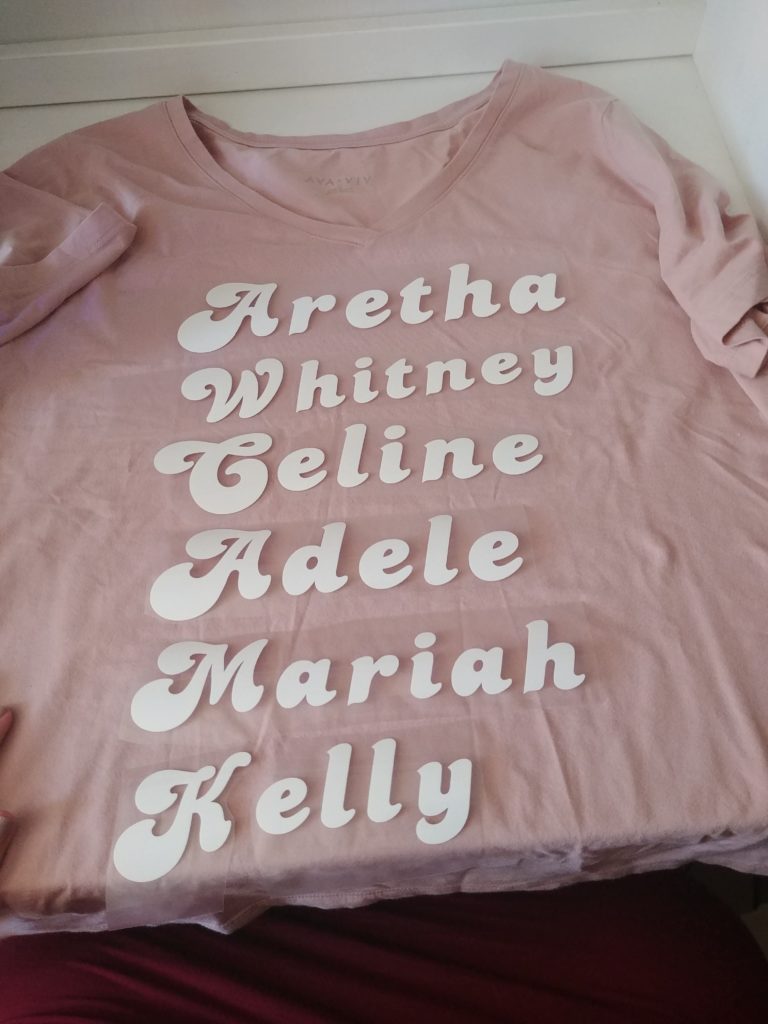
17. Now, use an iron to press on the design! I like to use a thin rag in between the iron and the design to help protect the material. If the iron is left on the iron-on material for too long it can ruin it! Press down on the design with the iron as much as possible when pressing the iron on material onto the shirt. Using a side to side motion or up and down could cause the design to move, get out of alignment, and turn out kinda sloppy! Also, watch out for those pesky corners! Make sure you get them really good. I usually let the iron sit on one part of the design for 5 seconds.
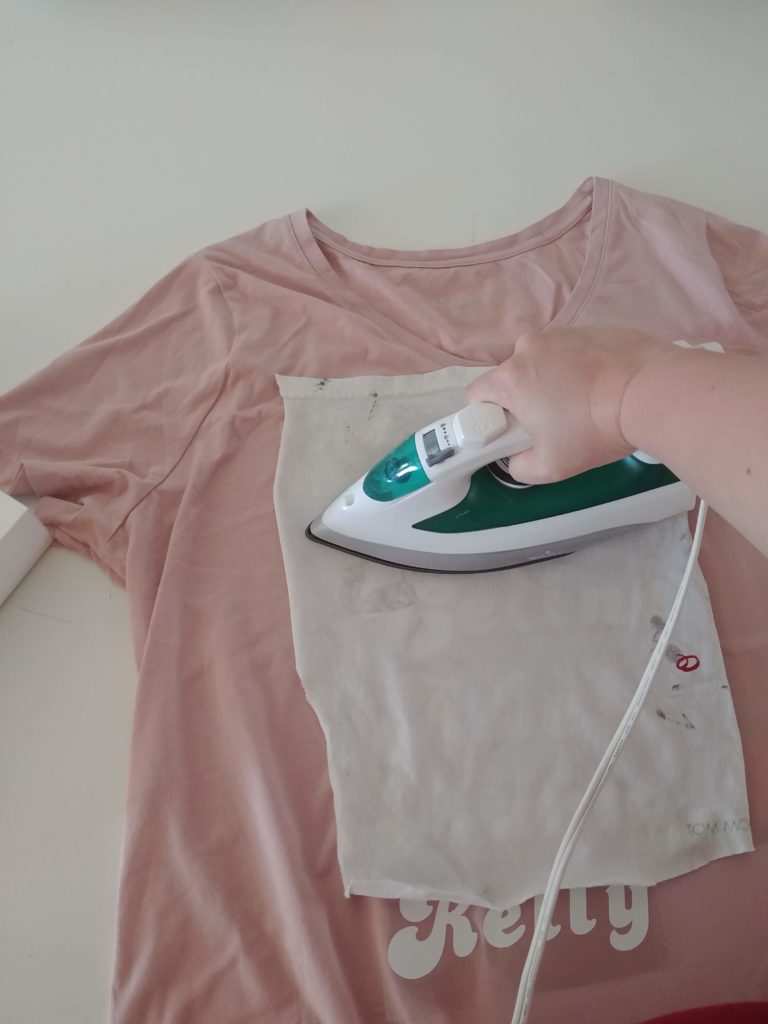
18. Once you have done a thorough job of applying heat pressure using the iron to all parts of the design, wait for the backing to cool off (or you’ll burn your fingers!) Once cooled, slowly pull of the backing looking for any iron on material that may not have adhered to the shirt. You can always go back and fix it, just make sure the backing is covering anything you’ve already peeled off!
Now you can enjoy your totally custom t-shirt! It’s so fun when people ask where you got it and you can tell them…I made it!